Blog

Things to Look for in Cheap Shared Web Hosting

When starting a new business, managing costs is crucial, and this includes choosing the right web hosting. Cheap shared web hosting can be an excellent choice for startups and small businesses due to its affordability and efficiency.

However, there are key factors to consider to ensure that the hosting service meets your growing business’s needs.

Shared Hosting

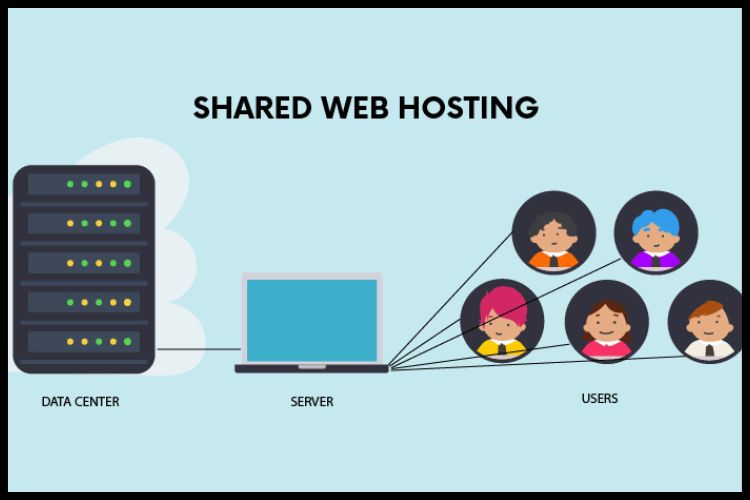
1.What is Shared Hosting?

Shared hosting involves hosting multiple websites on a single server, sharing resources like bandwidth and storage. While cost-effective, this can lead to potential issues like server downtime or slower page loads if one site overuses resources.

2.Choice of Operating System

Shared hosting typically offers two types of operating systems: Windows and Linux. Windows hosting, which requires a license fee, is ideal if your site uses ASP.NET and MYSQL.

Linux, on the other hand, is free and compatible with Python, PHP, Perl, and MySQL. Your choice should align with your website’s technical requirements.

3.Least Expensive Hosting Option

Shared hosting is the most budget-friendly option, especially for businesses with limited initial traffic and resource needs. The cost of server maintenance is divided among multiple users, making it an affordable choice.

However, be aware of its limitations and be prepared to move to a more robust hosting solution as your business grows.

4.What You Need from Cheap Shared Web Hosting

When choosing a shared hosting provider, consider these factors:

Uptime Guarantee

Look for at least 99% network uptime.

Server Load

Choose a provider that does not overload its servers with too many clients.

Support

Opt for providers that offer 24/7 support through email, live chat, and other channels.

Shared Web Hosting

5.Fully-Managed Services

Many cheap shared web hosting providers offer fully-managed services, where the provider handles all server-related tasks. This ensures optimal performance and resource management.

Businesses without IT expertise can particularly benefit from this, as it eliminates the need for hiring additional IT staff.

Conclusion

Cheap shared web hosting can be a smart start for new businesses, but it’s important to choose a provider that aligns with your specific needs.

Understanding the limitations and being ready to upgrade when necessary are key to ensuring that your hosting supports your business’s growth.

Frequently Asked Question

Q1.When should a business consider upgrading from shared hosting?

Upgrade when you experience frequent server crashes, slow page loads, or if your business outgrows the resources provided by shared hosting.

Q2.Is shared hosting secure for business websites?

Shared hosting can be secure, but it’s important to choose a provider that implements strong security measures and keeps software updated.

Q3.Can shared hosting handle e-commerce websites?

While shared hosting can support small e-commerce sites, businesses expecting high traffic or requiring extensive resources should consider more robust hosting options like VPS or dedicated hosting.

How to install Website Panel

Website Panel is a popular Windows hosting control panel that makes it easier for users to manage their hosted websites, databases, and other resources. For anyone looking to establish a hosting environment on a Windows server, Website Panel can be a handy tool.

This blog post will guide you through the installation process, ensuring that you can have your website panel up and running in no time. 

The Quick Process of Installing the Setup for Website Panel

Follow the steps outlined below:

1. Initialization

Double-click the Website Panel Installer icon on your server’s desktop. If you are not able to run the installer, you may need to right-click on the icon and then run as an administrator..

the Website Panel Installer icon on your server’s desktop

2. Component Overview

When the Website Panel Installer opens, click “View Available Components.”

the Website Panel Component Overview

3. Choosing the Server Setup

Click the “Install” link for “Website Panel Standalone Server Setup.”

Website Panel Standalone Server Setup.

4. Beginning the Setup

On the Setup Wizard, click “Next.”

The Wizard setup Beginning

5. License Agreement

You’ll then need to read and agree to the terms of the license agreement.

The Wizard setup terms of the license agreement.

6. System Check

The wizard will perform a system configuration check. The process may take a few minutes. Once completed and all statuses show “success,” click “Next.”

The wizard System configuration process

7. IP Configuration

In the next step, you’ll need to select an IP address for the Website Panel portal. If you are only working with the 2 standard IP addresses that came included with your server purchase (e.g., you did not purchase additional IP blocks), go ahead and select your primary (machine) IP address. Note that the port number is 9001.

The IP address for the Website Panel portal.

8. Database Settings

Next will be database settings. Do not change the SQL Server or authentication fields. They should remain as “localhost\sqlexpress” and “Windows Authentication.” You can, however, change the database name if you wish, but you can click “Next” without making any changes.

The SQL Server Database settings

9. Password Setup

Provide a strong password; this will be for the “server admin” account for the Website Panel.

Password Setup of the website panel

10. Installation

The installation process may take several minutes; once completed, click “Next.”

The installation process of website panel

11. Completion

Congratulations! The website panel is now installed. ”On the last step of the wizard, click Finish.”

The website panel is now installed.

12. Access

Your Website Panel portal will now be accessible from any internet-connected web browser by visiting http://[the IP address used in step 7]:9001.

Conclusion

Setting up the website panel is a straightforward process designed to get your hosting control panel up and running with minimal hassle. Once installed, you can effectively manage your hosted resources and ensure that everything runs smoothly.

For more information, visit our website, Ideastack

Frequently Asked Questions

Q1. What is the Website Panel used for?

Website Panel is a Windows-based hosting control panel. It helps users manage multiple hosting tasks, like setting up websites, databases, and other services, seamlessly.

Q2. If I encounter an error during the system configuration check, what should I do?

Ensure all system requirements are met and that you’re running the installation as an administrator. If the problem persists, visit the Website Panel community forums or contact their support for assistance.

Q3. Can I change the port number from 9001 to something else?

While the default port is 9001, advanced users can modify this after the installation. However, ensure that the new port isn’t being used by another service to avoid conflicts.