Blog

How to install TOMCAT on server by using panel CWP

Apache Tomcat is pivotal software in the world of Java-based web applications. Apache Tomcat is an open-source software that implements Java Servlet, Java Server Pages, Java Expression Language, and Java WebSocket technologies These specifications are fostered under the stewardship of the Java Community Process.

It’s worth noting that Apache Tomcat, Tomcat, Apache, the Apache feather, and the Apache Tomcat project logo are registered trademarks of the Apache Software Foundation.

Latest Release Notes: Apache Tomcat 8.0.14

The Apache Tomcat Project is elated to unveil the release of version 8.0.x of Apache Tomcat. Intended as a replacement for 8.0.x, it incorporates new features sourced from Tomcat 8.0.x. The foundational requirements in terms of Java version and implemented specification versions remain the same. Key changes from 8.0×2 include

Benefits

  1. Various enhancements in HTTP/2
  2. Resolutions for issues associated with file sending that might lead to subsequent requests facing Illegal State Exceptions
  3. Early access updates for Servlet 4.0.

Steps to Install Tomcat on the Server Using CWP Panel

Step 1

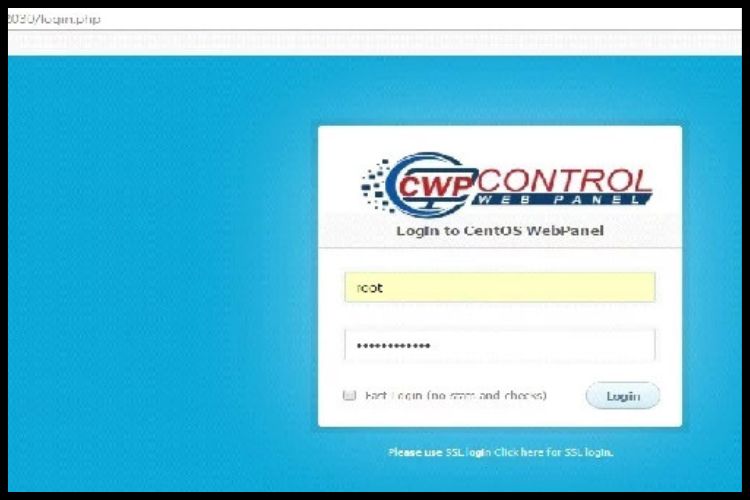
Navigate to your CWP panel by typing IP:2030 in your browser.

Login into your CWP panel

Step 2

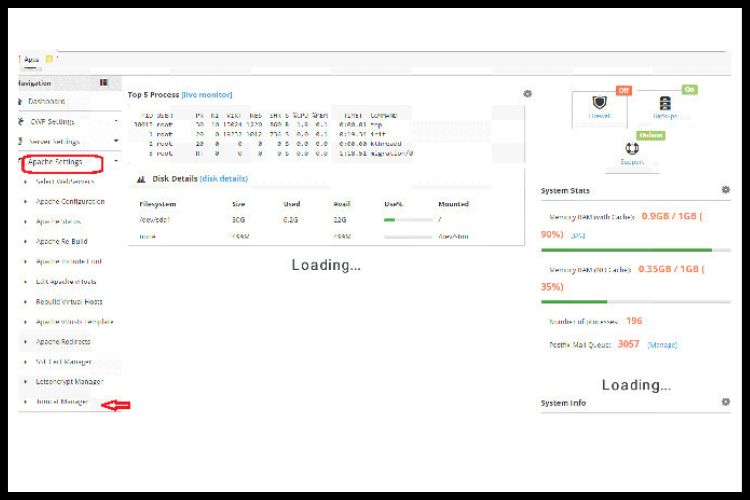
After a successful login, navigate to Apache Settings > Tomcat Manager. Click on Tomcat Manager for further installation options.

login into your CWP panel, GOTO Apache Setting

Step 3

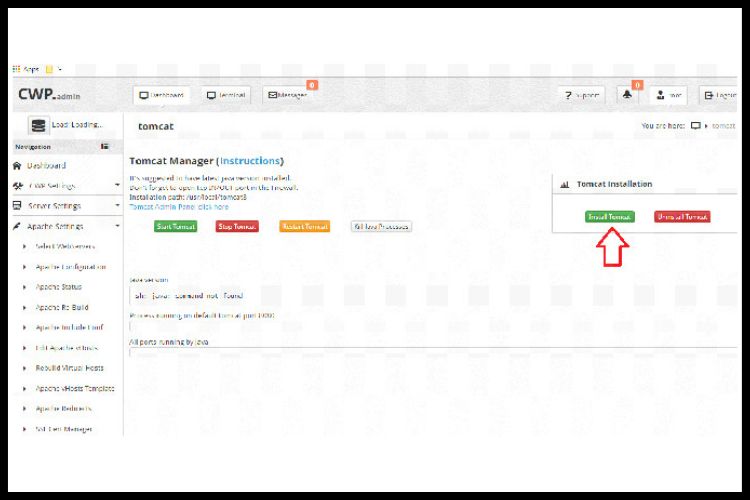
You’ll be greeted with an installation screen. Simply click on “Install Tomcat”. This process may take anywhere between 15 and 20 minutes.

To Install Tomcat on Server

Step 4

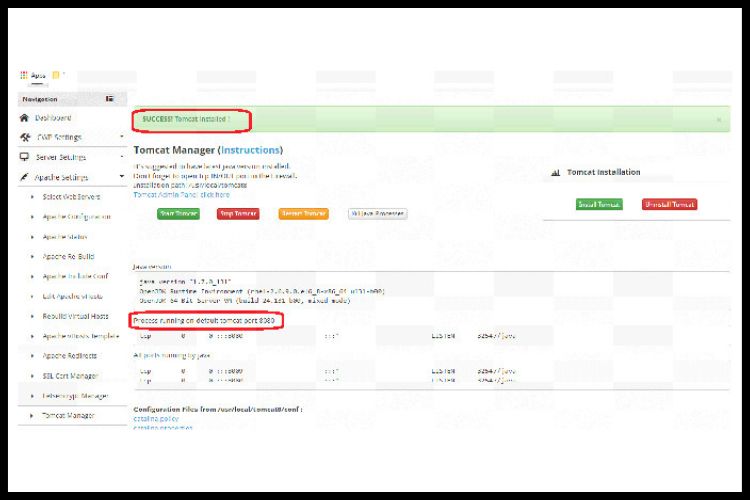
Upon successful installation, a success message will be displayed indicating “Tomcat Installed”.

Installation done of TOMCAT on Server

Step 5

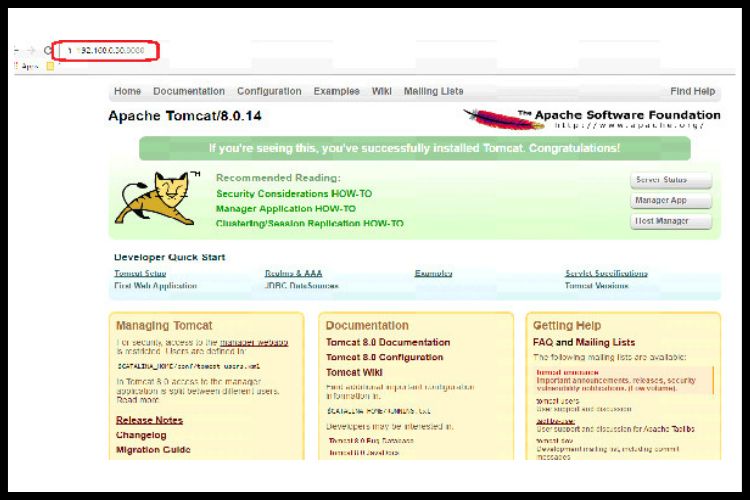
To verify, Tomcat operates on port 8080. Type the following in your browser: IP:8080 (for instance, 192.168.0.30:8080).

Verify your url under your Browser

Step 6

If the aforementioned URL displays the correct screen, rejoice! Tomcat has been successfully installed on your server. You are now ready to host your website using Tomcat.

You can host your website using Tomcat installed on your server

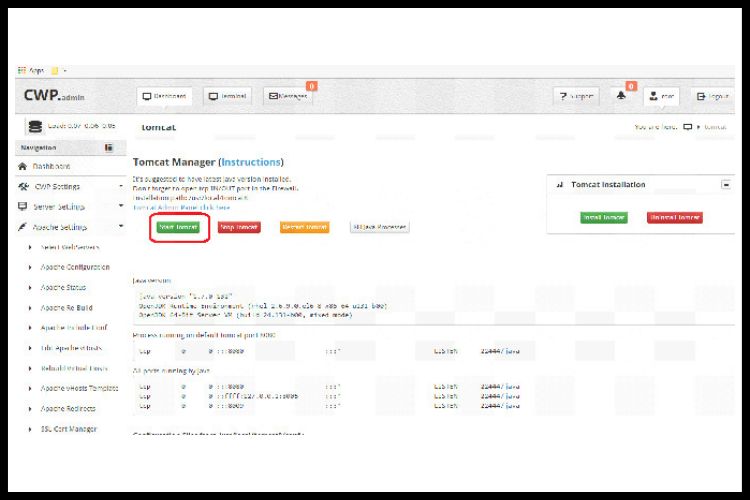
For management purposes, such as starting, restarting, or halting the Tomcat service, navigate to Apache Setting >> Tomcat Manager and choose the desired option.

For further information or assistance, feel free to contact us.

To get to know more click on Ideastack

Conclusion

Installing Tomcat using the CWP panel streamlines the process, making it user-friendly and efficient. Ensuring your server is equipped with this robust software guarantees a smooth sailing experience for hosting Java-based web applications.

Frequently Asked Questions

Q1. What is Apache Tomcat primarily used for?

Apache Tomcat is predominantly utilized to host Java-based web applications, serving as a servlet container.

Q2. Are there any costs associated with using Apache Tomcat?

No, Apache Tomcat is open-source software and is free to use, modify, and distribute.

Q3. How can I ensure the security of my Tomcat installation?

Regularly updating Tomcat to the latest version, following best security practices, and configuring firewalls and permissions appropriately will help in bolstering security.

How to install WordPress in CWP

CentOS Web Panel (CWP) is an intuitive platform that provides a structured environment for users aiming to seamlessly host and manage websites. While there are several content management systems out there, WordPress stands as the most popular choice due to its user-friendly interface and rich feature set. In this guide, we’ll walk you through the steps to install WordPress on CWP efficiently and effectively.

Getting Started: The installation process is straightforward and follows a structured pattern. Here’s a step-by-step rundown

1. Open the CWP panel and create a new account.

To start, you’ll need to have CWP installed on your server. Access the CWP panel by navigating to your server’s IP address followed by the port number, usually 2030 (for example, http://your_server_ip:2030). Log in using your root credentials.

Once inside the CWP dashboard

  1. Navigate to the ‘User Accounts’ section.
  2. Click on ‘New Account’.
  3. Fill in the necessary details, such as domain name, username, and password.
  4. Click ‘Create’. This action sets up a new user account with its public_html directory where you’ll install WordPress.
Open the CWP panel and create a new account.

2. Create a MySQL database.

Before installing WordPress, you need a database

  1. In the CWP dashboard, navigate to ‘SQL Services’.
  2. Click on ‘MySQL Manager’.
  3. Select ‘Create Database & User’.
  4. Fill in the desired database name, username, and password. Note these details as they’ll be essential for the WordPress setup.
  5. Click ‘Create’. Your new database and user are now ready.

3. Take SSH access to servers and run the following commands.

Now, it’s time to download and set up WordPress files:

3.1.Navigate to the user's directory:

CD /home/USERNAME/public_html

3.2. Download the latest WordPress archive:

wget http://wordpress.org/latest.tar.gz

3.3. Extract the archive:

tar xvzf latest.tar.gz

3.4. Move the WordPress files to the root of the public_html directory:

mv WordPress/*

3.5. Remove the now-empty WordPress directory

rm -rf WordPress

3.6. Assign appropriate permissions:

chown -R USERNAME:USERNAME *

Create a MySQL database.

4. WordPress Configuration:

Once the files are in place, configuring WordPress is the next step:

4.1. In a browser, navigate to your domain name.

Once the files are in place, configuring WordPress is the next step

4.2. Provide the database details:

Enter the database name, username, and password you created in step 2.

4.3. Fill in the site-specific details

Input the site title, admin username, password, and email.

4.4. Once all is set, click on the 'Install WordPress' button.

After a successful installation, you can log in to the WordPress Admin section using the credentials you provided.

Click To Know More Ideastack

Conclusion

Installing WordPress on CentOS Web Panel (CWP) is a straightforward process, allowing users to benefit from both the robustness of CWP and the versatility of WordPress. This union facilitates easy management, scalability, and an enriched user experience for website developers and visitors alike. By following the outlined steps, you can have your WordPress site up and running in no time.

Frequently Asked Questions

1. What should I do if the WordPress installation wizard doesn't appear?

Ensure that you’ve correctly moved all the WordPress files to the public_html directory. Also, check your domain’s DNS settings to make sure it’s pointing to your CWP server’s IP address.

2. Can I use this process to set up multiple
WordPress installations on CWP?

Yes, you can. For each new WordPress site, create a new user account in CWP. This will give you a separate public_html directory for each website. Then, simply repeat the installation process for each domain.

3. How do I ensure my WordPress installation on CWP remains secure?

Regularly update WordPress core files, plugins, and themes. Use strong, unique passwords and consider integrating security plugins like Wordfence or Sucuri. Always take backups, and monitor user activities. Lastly, ensure your CWP and server software are up-to-date.