Blog

INSTALL SSL IN CWP PANEL

Securing your website with an SSL certificate is not just a best practice for website security; it’s also a requirement for many aspects of web functionality. If you’re using the Control Web Panel (CWP), installing an SSL certificate is a straightforward process. Here’s how you can ensure your site is secure by installing an SSL certificate in CWP.

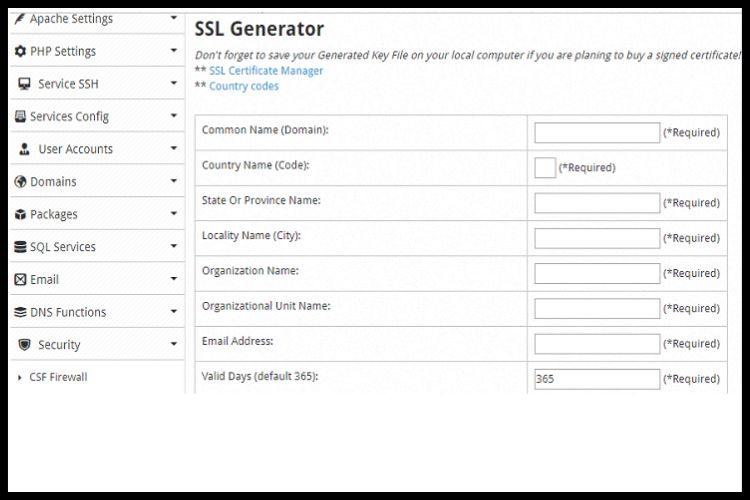
1. Download Your SSL Certificate and Key

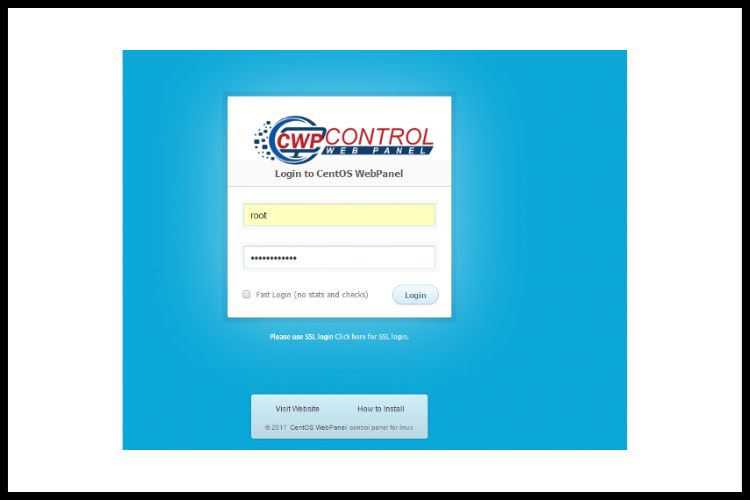
The journey to a secure website begins with your SSL certificate and key. To obtain these, you need to log into your CWP panel. Navigate to the SECURITY section and find the SSL generator. Here, you’ll generate your CSR (Certificate Signing Request) private key. This is a crucial first step, as it’s the information you’ll provide to an SSL certificate provider to obtain your certificate.

2. Verify Apache Configuration

Before proceeding, it’s essential to ensure that your Apache server is listening on port 443, the default port for HTTPS traffic. If Apache isn’t configured to listen on this port, your SSL certificate won’t function correctly, and your site won’t be accessible via HTTPS.

Using the Control Web Panel (CWP), installing an SSL certificate

3. Purchase Your SSL Certificate

With your CSR in hand, it’s time to purchase your SSL certificate. Provide the CSR to your chosen SSL seller company. They will use this to generate your SSL certificate. Once you’ve received your SSL certificate from the seller, you’re ready for the next step.

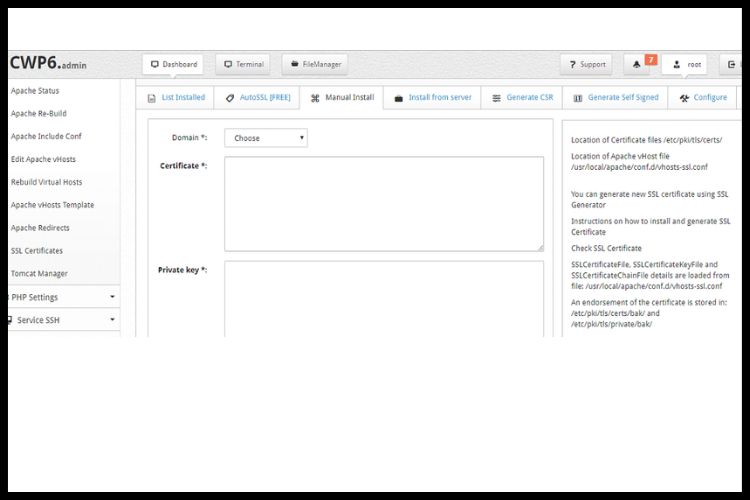
4. Install Your SSL Certificate

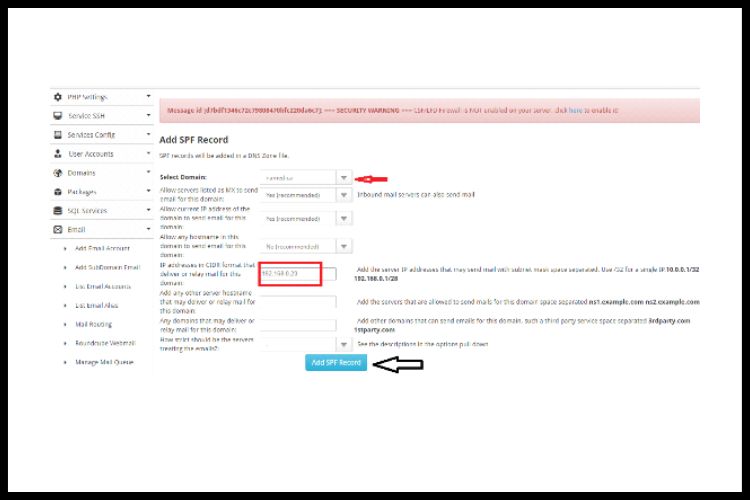
In your CWP panel, look for the option to “Browse installed SSL Certificates.” This is where you’ll upload the SSL certificate you’ve received from your SSL provider. Ensure that the certificate is correctly installed in the corresponding user’s directory.

Install Your SSL Certificate

5. Edit the Certificate File

Next, you’ll need to edit the certificate file located at /etc/pki/tls/certs/DOMAIN.COM.cert. Replace “DOMAIN.COM” with your actual domain name. This step is crucial as it links the certificate to your domain.

6. Manage Your SSL Certificate

The final step is to go to the SSL Manager in your CWP panel. Here, you’ll install the certificate for the user and define the path where it’s needed. This finalizes the installation process.

Conclusion

Congratulations! You’ve successfully installed a valid SSL certificate on your website using the CWP panel. This will not only secure your website but also improve your site’s trustworthiness among users and search engines alike.For more detailed information and assistance, don’t hesitate to visit our website at Ideastack. Our comprehensive guides and expert support can help you navigate even the most complex aspects of website security.

Frequently Asked Questions

Q1. How long does an SSL certificate last?

SSL certificates typically last for 1-2 years, depending on the type of certificate and the provider. After this period, you will need to renew your certificate to maintain your website’s security.

Q2. Can I install an SSL certificate for free?

Yes, there are several providers like Let’s Encrypt that offer free SSL certificates. However, these may have different features and renewal periods compared to paid certificates.

Q3. What happens if my SSL certificate expires?

If your SSL certificate expires, browsers will begin to show a warning to visitors that your site is not secure, which can significantly impact your site’s trustworthiness and visitor traffic. To prevent potential issues, it is crucial to renew your SSL certificate before it expires.

How to install WordPress in CWP

CentOS Web Panel (CWP) is an intuitive platform that provides a structured environment for users aiming to seamlessly host and manage websites. While there are several content management systems out there, WordPress stands as the most popular choice due to its user-friendly interface and rich feature set. In this guide, we’ll walk you through the steps to install WordPress on CWP efficiently and effectively.

Getting Started: The installation process is straightforward and follows a structured pattern. Here’s a step-by-step rundown

1. Open the CWP panel and create a new account.

To start, you’ll need to have CWP installed on your server. Access the CWP panel by navigating to your server’s IP address followed by the port number, usually 2030 (for example, http://your_server_ip:2030). Log in using your root credentials.

Once inside the CWP dashboard

  1. Navigate to the ‘User Accounts’ section.
  2. Click on ‘New Account’.
  3. Fill in the necessary details, such as domain name, username, and password.
  4. Click ‘Create’. This action sets up a new user account with its public_html directory where you’ll install WordPress.
Open the CWP panel and create a new account.

2. Create a MySQL database.

Before installing WordPress, you need a database

  1. In the CWP dashboard, navigate to ‘SQL Services’.
  2. Click on ‘MySQL Manager’.
  3. Select ‘Create Database & User’.
  4. Fill in the desired database name, username, and password. Note these details as they’ll be essential for the WordPress setup.
  5. Click ‘Create’. Your new database and user are now ready.

3. Take SSH access to servers and run the following commands.

Now, it’s time to download and set up WordPress files:

3.1.Navigate to the user's directory:

CD /home/USERNAME/public_html

3.2. Download the latest WordPress archive:

wget http://wordpress.org/latest.tar.gz

3.3. Extract the archive:

tar xvzf latest.tar.gz

3.4. Move the WordPress files to the root of the public_html directory:

mv WordPress/*

3.5. Remove the now-empty WordPress directory

rm -rf WordPress

3.6. Assign appropriate permissions:

chown -R USERNAME:USERNAME *

Create a MySQL database.

4. WordPress Configuration:

Once the files are in place, configuring WordPress is the next step:

4.1. In a browser, navigate to your domain name.

Once the files are in place, configuring WordPress is the next step

4.2. Provide the database details:

Enter the database name, username, and password you created in step 2.

4.3. Fill in the site-specific details

Input the site title, admin username, password, and email.

4.4. Once all is set, click on the 'Install WordPress' button.

After a successful installation, you can log in to the WordPress Admin section using the credentials you provided.

Click To Know More Ideastack

Conclusion

Installing WordPress on CentOS Web Panel (CWP) is a straightforward process, allowing users to benefit from both the robustness of CWP and the versatility of WordPress. This union facilitates easy management, scalability, and an enriched user experience for website developers and visitors alike. By following the outlined steps, you can have your WordPress site up and running in no time.

Frequently Asked Questions

1. What should I do if the WordPress installation wizard doesn't appear?

Ensure that you’ve correctly moved all the WordPress files to the public_html directory. Also, check your domain’s DNS settings to make sure it’s pointing to your CWP server’s IP address.

2. Can I use this process to set up multiple
WordPress installations on CWP?

Yes, you can. For each new WordPress site, create a new user account in CWP. This will give you a separate public_html directory for each website. Then, simply repeat the installation process for each domain.

3. How do I ensure my WordPress installation on CWP remains secure?

Regularly update WordPress core files, plugins, and themes. Use strong, unique passwords and consider integrating security plugins like Wordfence or Sucuri. Always take backups, and monitor user activities. Lastly, ensure your CWP and server software are up-to-date.

What is SPF Record ? & How to set SPF Record of your domain in to CWP panel ?

What is SPF Record?

An SPF record is a type of Domain Name Service (DNS) record that identifies which mail servers are permitted to send an email on behalf of your domain.

SPF records are typically defined using the TXT record type. There is also an SPF record type, however, it is deprecated and thus you should always have at least the TXT record definition present, even if you use the SPF type.

What is the purpose of an SPF record?

The purpose of an SPF record is to prevent spammers from sending messages forged from addresses at your domain. Recipients can refer to the SPF record to determine whether a message purporting to be from their domain comes from an authorized mail server.

If your domain does not have an SPF record, some recipient domains may reject messages from your users because they cannot validate that the messages come from an authorized mail server.

If you’ve already set the SPF record for your domain, it means that you have set Google’s servers in the SPF records.

What is SPF record example?

SPF records are define as a single string of text. Here is an example record:

v=spf1 a mx ip4:192.168.0.20 include:_spf.google.com ~all

The SPF record always starts with the v= element. This indicates the SPF version that is use. Right now the version should always be spf1 as this is the most common version of SPF that is understood by mail exchanges.

How to set SPF records of your domain into the CWP panel?

Just follow the below few steps to set the SPF Record of your domain under the CWP panel:

Step 1:-

Login to your CWP panel by using port: 2030
url: https://server ip:2030

Step 1

Step 2.1:-

Go to the Email section under your Login CWP panel. You will find their SPF manager, just click on it.

Step 2.2:-

Once you will click on SPF manager it will provide the below screen for SPF setup.

Step 2.2

Step 3:-

Just select your domain in the drop down, and mention the server IP. After filing detail just click on Add SPF Record. Using the above step we can set Your domain SPF Record, under the CWP panel.

Step 4:-

To verify the SPF Record. Just go to DNS Function >> List DNS zone >> click on edit your domain DNS zone. You will see add the bottom of your DNS zone file your domain SPF Record has been added in txt format.

Conclusion

Still confused about what is SPF Record? & how to set SPF Record of your domain in to CWP panel? Contact Ideastack now.

Frequently Asked Questions

Q1. Why do I need an SPF record?

SPF is a standard email authentication method. SPF helps shield your domain from spoofing and keeps receiving servers from flagging your outgoing communications as spam. The mail servers that are authorized to send an email for your domain are listed in SPF.

Q2. How do I fix my SPF record?

Examine the servers and services in your SPF record. Take the actions in Verify if you already have an SPF record. Make sure your SPF record includes all servers and senders that currently send email for your domain. Any new sender information needs to be updated in your SPF record.

Q3. How long can an SPF record be?

The Domain Name System (DNS) has a 255 character string limit for Sender Policy Framework (SPF) records. If your SPF record contains a string that is longer than 255 characters, the SPF authentication check will fail.